| EARTH ART AND FOODS |
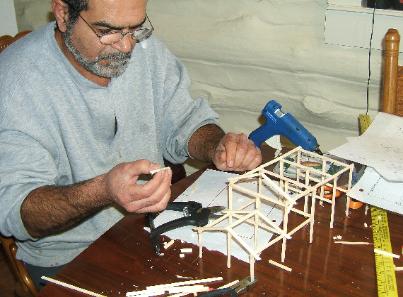
| The first part of the planning process after drawing up the basic outlay on graph paper for us was to build a shop model using match sticks. In this picture we have completed the second floor and the front porch using graph paper to downsize the original dimensions. I wanted to make sure the building looked proportionately appealing. |
| The next step was to order the material we needed to start the building. We managed to save some money by shopping around and asking for contractor prices since we were ordering in quantities. We wanted to make sure we were dealing with reputable dealers since many discount outlet's carry sub-grade material. Quality lumber is essential for a quality project. |
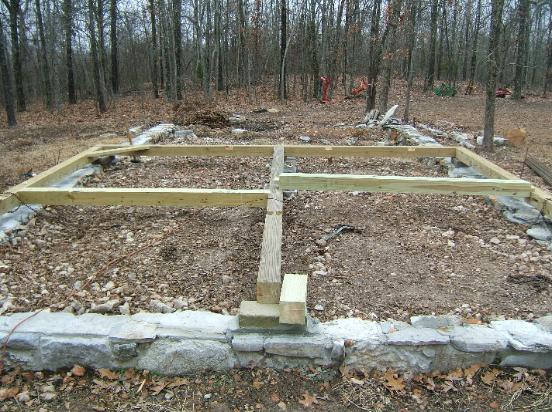
| In order to save on expenses the 10 inch thick foundation that serve as the perimeters for the shop were made with local rocks we picked from nearby roadsides. Following the recent trends, we chose to use treated lumber to build the shop as there are many advantages to treated wood's longevity and durability. The basic frame for the initial shop wall is being assembled here. |

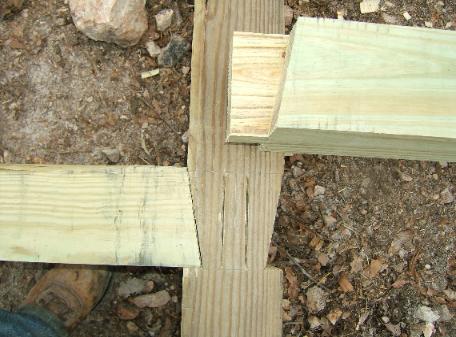
| We used shoulder tenon notches on all of the load bearing beams including the timber that receives second floor joists. To achieve a viable shoulder tenon joint allow at least one inch of shoulder in the vertical beams. Typically, a 6"X6" treated timber from a lumberyard will end up shrinking to a 5-1/2" x 5-1/2 inch timber. The tongue should protrude inside the tenon deep enough to be pegged by a 5/8" dowel without compromising the tongue. |
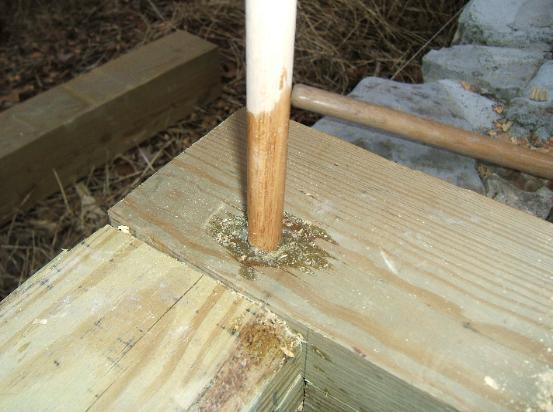
| The dowel should be a high quality wood made of either maple or other hardwood that can resist shearing pressure. Oak for example has about 10,000 pound shearing pressure per inch; maple dowel posses similar qualities to that of oak. We soaked our dowels in a water sealant both to protect the dowel as well as lubricating it for an easier drive into the posts. |
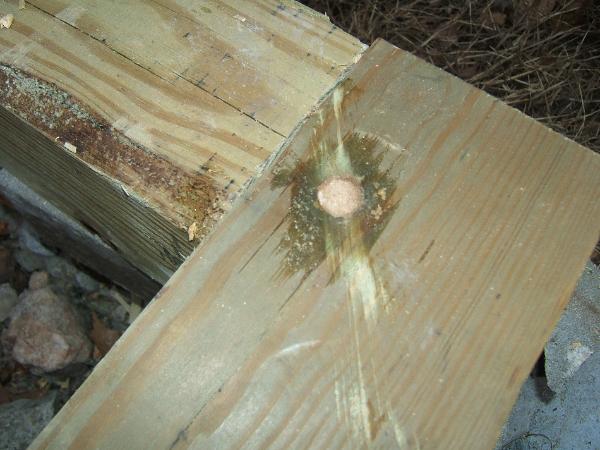
| You can either cut the dowels flush with the timber or create and extension to utilize it as hanging rod. Also, you can either drill and drive the dowel all the way through the timber or partially. Be sure to drill the hole one inch less than the total width of the timber and mark the dowel with a pencil so it protrude deep enough to support the tenon. |
| One difficulty in cutting freshly treated wood is that the moisture content will cause the saw blade to jamb; so make your cuts patiently and allow for shrinkage. Quality tools will always endure the stress any project may pose. I prefer using steel saw blades instead of carbide blades, mainly because steel blades are thinner and can make as good a clean cut as carbides do and they do not stress your equipment. A $40 carbide blade can buy you about four steel saw blades. |

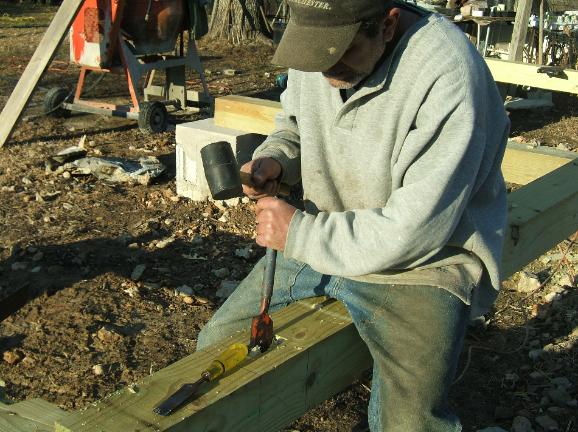
| Cutting the mortise can be a tedious job depending on how deep you have to gauge out the cavity. The tools I am using I purchased almost thirty years ago to build our house with; they are old Craftsman tools that I purchased from Sears. The steel is the fines quality I have yet to come across |
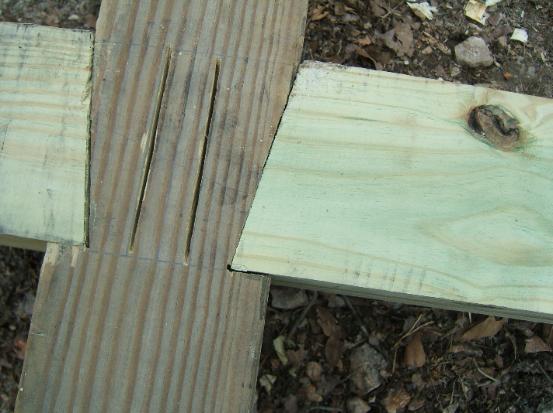
| Here, the two floor joists are fitted into the middle beam prior to inserting the dowels. Using treated pine timber your best bid is to make the tightest fit possible because the end result may be totally different from what you expected due to shrinkage and difficulty of making precise cuts. However, you can minimize problems by purchasing all your lumber from the same stock. |
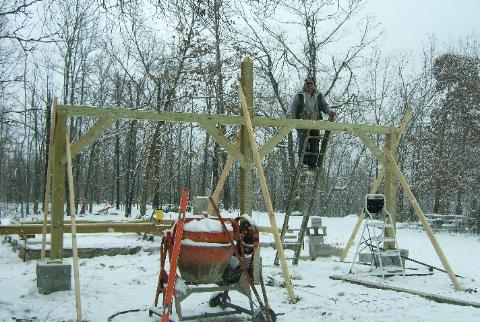
| It was necessary for us to raise the top plate 30-40 degrees above ground in order to erect the walls in position. Using a come along and some creative ideas, we managed to raise this wall with little effort without any major incidents to regret in less than 12 hours. If you are lucky enough to gather the neighbors and friends to assist you a whole shop can be raise in a few days if all the notching are done in advance. |
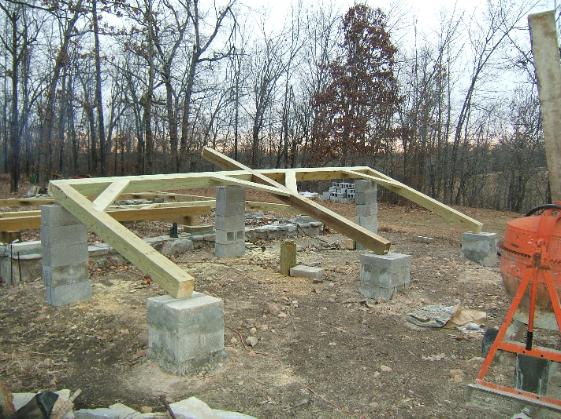
| The front wall is erected and secured with 2X4's that are dug into the ground to prevent slipping. We had a major snow storm in our area, but the work had to go on since hot weather was just around the corner and we didn't want to do this heavy work in the summer months . Securing thefirst wall is not a major task but very necessary to ensure the second wall will connect to it at a right angel when the horizontal tiers are put up. The knee braces will help keep the structure in place so it won't sway sideways which can compromise the overall structure as it is being assembled. |
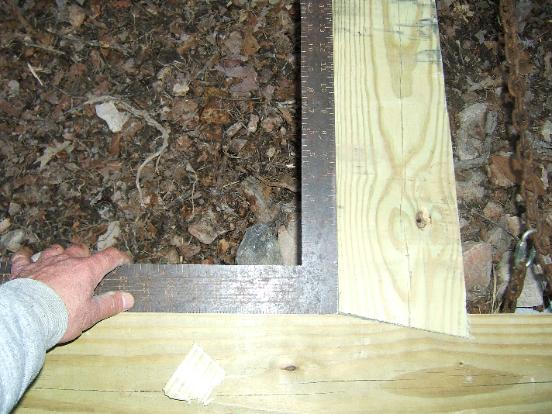
| The instructions below should help you understand the process of building a timber frame structure: Before using a square to square your structure be sure to throughly examine your timber for warp and twists. Make sure the crown of the warp is always up whether it suppports its own weight or not. The best way to square a warped timber is by chalk line. snap a line that covers the bottom curve or the crown; then either measure it square or use a large square. |